

Simple Plumbing Fixes You Can Do Yourself: DIY Plumbing Repairs and Solutions for Homeowners
Home plumbing issues like dripping taps and slow drains can waste water, create noise and escalate into costly repairs if left unchecked. This guide promises practical, step-by-step solutions for common DIY plumbing repairs, empowering homeowners to restore proper flow, stop leaks and maintain fixtures. You will learn about the most frequent problems you can tackle safely, the essential tools required for these tasks and how to spot warning signs before they become emergencies. Alongside clear instructions, you will discover when complexity demands professional intervention and how Mack’s Plumbing’s reliable service can step in for advanced or emergency issues. Topics covered include leak identification, tap repair, drain unblocking, toilet adjustment, water pressure improvement, water heater maintenance and guidance on when to call in expert help.
What Are the Most Common Plumbing Problems Homeowners Can Fix Themselves?
Minor leaks, slow-draining sinks and running toilets rank among the simplest plumbing issues that homeowners can resolve without specialised training. These problems often stem from worn-out washers, debris buildup in traps or misaligned float valves, and addressing them promptly prevents water waste and preserves fixture longevity. Proper diagnosis and maintenance can restore normal function within an hour for most DIY fixes. Understanding these tasks builds confidence in basic plumbing and lays the foundation for more advanced repairs.
Below is an overview of five frequent DIY plumbing problems, their immediate cause and why tackling them early matters.
These scenarios illustrate how simple component wear or debris accumulation can escalate into persistent issues, encouraging prompt attention and setting the stage for detailed repair steps below.
Which Simple Plumbing Issues Can You Safely Repair at Home?
Homeowners can safely repair tasks that involve cartridge replacement, basic seal changes and debris clearance without shutting off whole-house water systems. Dripping taps typically require turning off the local shut-off valve, dismantling the faucet, replacing a washer or o-ring and reassembling the unit with plumber’s tape for a secure seal. Clearing minor sink or shower clogs involves a plunger or drain snake to dislodge blockages, while toilet float adjustments and flapper swaps restore proper flush cycles. Routine cleaning of aerators and showerheads holds no special risk beyond minor water spillage, making these low-pressure tasks ideal for DIY maintenance.
What Tools Do You Need for Basic DIY Plumbing Fixes?
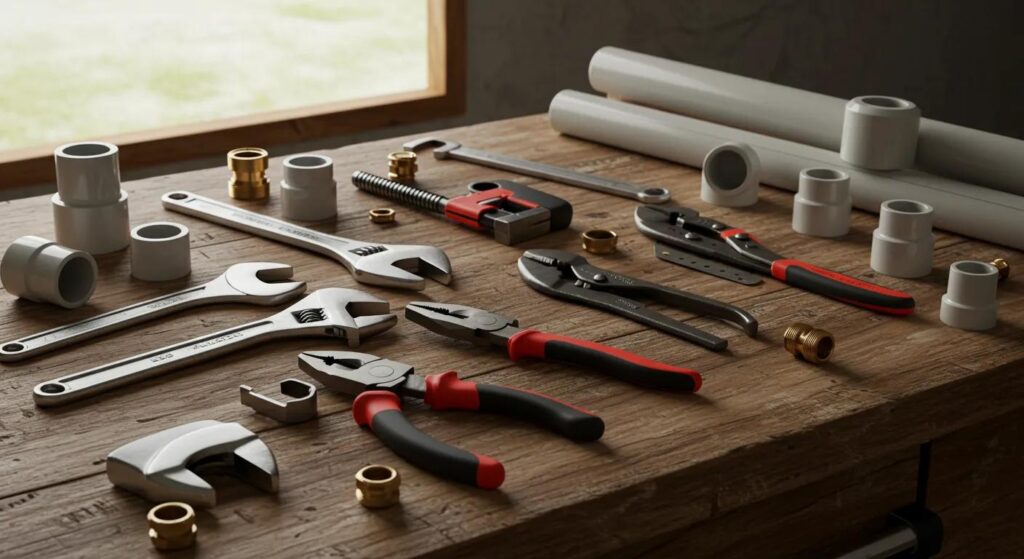
A concise set of tools covers most plumbing repairs around the home.
- An adjustable wrench with smooth jaws to avoid scratching fittings.
- A cup plunger and a small drain snake for opening minor blockages.
- Plumber’s tape to ensure leak-free threaded connections.
- A flat-head screwdriver for removing aerators and access panels.
- A replacement washer and o-ring kit for tap repairs.
These instruments equip you to tackle leaks, clogs and faucet disassembly. Having them organised before beginning any repair streamlines the process and reduces the chance of interruption.
How Can You Identify Signs of Leaks, Clogs, and Running Toilets?
Visible dripping, persistent pooling around fixtures and low flow indicate leaks within faucet bodies or supply lines. Slow drainage or gurgling noises point to partial blockages in trap arms or P-traps, which may require mechanical clearing. A toilet that runs continuously after flushing reveals a worn flapper valve or misaligned float mechanism failing to seal the flush valve. Recognising these symptoms early helps prioritise DIY tasks and determine when intervention by Mack’s Plumbing is advisable for complex leak sources or concealed pipe damage.
How Do You Fix a Leaky Tap Yourself? Step-by-Step Guide
Fixing a leaky tap involves identifying the worn component, replacing it correctly and confirming a watertight seal. A dripping faucet not only wastes water but can accelerate corrosion around sink fixtures. Completing this repair restores quiet operation and conserves resources through a straightforward sequence of actions. Below is a breakdown of root causes, required materials, stepwise replacement and criteria for professional support.
What Causes a Leaky Tap and Why Should You Fix It Quickly?
A leaky tap typically stems from a hardened washer, degraded o-ring or mineral deposits creating gaps in the seal. Even a slow drip can waste hundreds of litres annually, increasing utility bills and risking water damage to cabinetry or countertops. Addressing the issue promptly reduces water waste, prevents fixture wear and curtails excess strain on supply lines. Rapid intervention also helps avoid the need for more extensive servicing or complete faucet replacement.
What Tools and Materials Are Needed to Repair a Leaky Faucet?
Before starting, gather all supplies to ensure continuity.
- Adjustable wrench to loosen faucet fittings without marring surfaces.
- Replacement washers and o-rings sized to your faucet cartridge type.
- Plumber’s tape for reinforcing threaded joint seals.
- Cotton cloth to protect fixture finishes and absorb residual drips.
- Penetrating lubricant to ease removal of corroded components.
Organising these items in advance means you can complete the repair without delays, maintaining flow in your schedule.
How to Replace a Washer or O-Ring to Stop a Dripping Tap?
Begin by closing the water supply at the under-sink shut-off valves and opening the faucet to relieve pressure. With the handle removed, use the adjustable wrench to extract the valve stem and inspect the washer or o-ring for signs of wear. Fit the new component, ensuring it sits flush against the valve seat, then wrap plumber’s tape around any threaded sections before reassembly. Tighten fittings snugly but avoid over-torquing, then reopen the water supply and test the tap for any residual drips.
When Should You Call a Professional for Tap Repairs?
If the leak persists after washer or o-ring replacement, internal cartridge damage or corroded valve seats may be the cause. Complex repairs involving ceramic disc cartridges, concealed in-wall valves or extensive mineral encrustation often require specialised tools and expertise. In such cases, contacting Mack’s Plumbing ensures a thorough diagnosis and durable solution. Scheduling a service appointment prevents water loss and safeguards against potential hidden damage.
What Are Easy Ways to Unclog a Drain Yourself?
Unclogging a slow or blocked drain often restores normal operation without chemical cleaners or professional intervention. Moderate blockages caused by hair, soap scum or grease can be cleared using manual tools and safe household ingredients. Acting quickly prevents backups, odours and potential pipe damage under sink or shower assemblies. The steps below outline mechanical and natural methods before escalating to professional services.
How Can You Use a Plunger or Drain Snake to Clear a Blocked Drain?
A cup plunger creates a pressure differential to dislodge soft debris from drain traps. Begin by sealing overflow holes with a damp cloth, positioning the plunger over the drain opening and pumping firmly until water flows freely. For stubborn blockages, insert a small drain snake into the trap arm, rotating the handle to break up accumulated matter. Withdraw the tool slowly, remove debris on the coil and rinse the drain with warm water to confirm clearance.
Can Baking Soda and Vinegar Help with Minor Drain Clogs?
Combining baking soda and vinegar triggers a mild foaming reaction that loosens residue inside pipes without corrosive chemicals. Pour half a cup of baking soda down the drain, followed by an equal amount of white vinegar, then cover the opening for five minutes. After the reaction subsides, flush the drain with hot water to carry away loosened particles. This natural remedy supports regular maintenance and prevents gradual buildup in sink, shower and bath drains.
What Are the Signs of a Serious Clog That Needs Expert Help?
Persistent gurgling, frequent backups and water pooling despite plunging indicate deeper obstructions in main lines or branch connections. Unusual odours emanating from multiple drains suggest extensive residue beyond reach of manual tools. In such instances, professional drain cleaning equipment and video inspection capabilities are required. Contact Mack’s Plumbing for thorough removal of blockages and to restore optimal flow while avoiding pipe damage.
How Can You Troubleshoot and Repair a Running Toilet?
A running toilet wastes water continuously and signals a misaligned or worn internal component within the cistern. Proper inspection and targeted repair can stop this issue quickly, preventing resource waste and high utility bills. The following guidance explains common faults, step-by-step valve adjustments and when to secure professional support for persistent malfunctions.
What Causes a Running Toilet and How Does It Waste Water?
A running toilet usually results from a flapper valve that fails to seal properly or a fill valve that does not shut off after tank refill. The continuous trickle allows water to cycle from tank to bowl without flushing, potentially using thousands of litres daily. This constant flow increases water bills and may contribute to corrosion or algae buildup. Identifying the exact valve fault helps restore watertight performance and conserve supplies.
How to Inspect and Replace the Flapper Valve and Fill Valve?
Start by turning off the water supply at the isolation valve behind the toilet and flushing to empty the cistern. Lift the flapper to examine for warping, cracks or mineral scale; replace it with a compatible rubber flapper if any damage appears. Next, inspect the fill valve for smooth movement and clean the filter screen at its base to remove sediment. Install a new fill valve assembly where necessary, following manufacturer directions for correct height and sealing.
What Are Simple Adjustments to Fix Toilet Float Issues?
If the float arm sits too high, the fill valve remains open, causing overflow into the overflow tube. Gently bend the float arm downwards or adjust the float clip to lower the shut-off point. For cup floats, slide the adjustment clip on the valve shaft to set the correct water level, typically one inch below the overflow. Verifying float height ensures that the tank refills fully but does not continue to flow.
When Is Professional Toilet Repair Necessary?
Persistent leaks around the base, damaged overflow tubes or corroded valve assemblies often require removal of the tank for full access. In cases where older toilet mechanisms lack replacement parts or the bowl flange is compromised, an expert intervention is essential. Engaging Mack’s Plumbing guarantees a secure, code-compliant repair and helps you avoid repeated issues or water damage to bathroom flooring.
What DIY Solutions Can Improve Low Water Pressure in Your Home?
Low water pressure at faucets or showerheads often results from sediment buildup or regulator misalignment and can be addressed with simple cleaning and basic adjustments. Boosting flow improves everyday tasks like showering and washing dishes without calling in complex pump installations. This section explains maintenance steps, regulator roles and leak detection before professional escalation.
How to Clean Faucet Aerators and Showerheads to Boost Water Flow?
Mineral deposits accumulate in aerator screens and reduce nozzle openings over time. Unscrew the aerator housing, remove the screen, soak it in vinegar for fifteen minutes and scrub off residue with an old toothbrush. Rinse thoroughly before reassembling and test the flow to confirm restoration of full pressure. For showerheads, detach, immerse in a vinegar solution overnight and flush out loosened scale to improve spray patterns.
What Role Does a Water Pressure Regulator Play and Can You Adjust It?
A water pressure regulator maintains safe incoming pressure to prevent pipe stress and fixture leakage. Located near the main supply shut-off, it features an adjustment screw that increases or decreases downstream pressure. Turning the screw clockwise raises pressure, while counterclockwise lowers it; small increments ensure you avoid exceeding recommended home pressure levels. Adjusting the regulator can resolve widespread low-pressure issues without rewiring or repiping.
Proper calibration of these parts prevents damage and maintains consistent pressure throughout the home, preparing for advanced diagnostics if needed.
How to Detect Pipe Corrosion or Leaks Affecting Water Pressure?
Inspect visible supply lines under sinks and behind appliances for greenish or white corrosion patches and wet spots. Listen for hissing sounds that signal pinhole leaks or pressure imbalances. Use a dry paper towel to wipe suspected areas and check for moisture, then tighten loose fittings lightly. Early leak detection preserves pipe integrity and maintains pressure without requiring full repiping.
When Should You Contact a Plumber for Low Water Pressure Issues?
If multiple fixtures exhibit low flow despite regulator adjustment and aerator cleaning, obstructions or pipe corrosion may lie deeper within the plumbing network. Pressure testing and video inspection equipment reveal hidden restrictions or leaking joints beyond a homeowner’s toolkit. Mack’s Plumbing can perform comprehensive diagnostics and implement targeted repairs or partial repiping to restore reliable water delivery and prolong system lifespan.
How Do You Perform Basic Water Heater Maintenance Yourself?
Routine water heater maintenance prolongs tank life, ensures efficient heating and prevents sediment accumulation that reduces performance. Homeowners can flush sediment and verify thermostat settings to optimise energy use safely. This section covers benefits, safe procedures and signs indicating the need for professional intervention.
What Are the Benefits of Flushing Sediment from Your Water Heater?
Sediment collects at the bottom of storage tanks, reducing heat transfer efficiency and increasing energy consumption. Flushing the tank annually removes accumulated minerals, restores rapid heating and extends the appliance’s service life. Clean tanks also reduce noise during operation and minimise corrosion risk. Regular flushing supports consistent hot water supply and keeps running costs lower.
How to Check and Adjust the Thermostat Setting Safely?
First, turn off the power supply or gas control valve according to your heater type and let water cool slightly. Remove the access panel, test the thermostat with a screwdriver gauge and adjust to the manufacturer’s recommended temperature, typically 50–55 °C for residential use. Avoid settings above 60 °C to prevent scalding hazards and unnecessary energy waste. After adjustment, replace panels securely and restore power or pilot light.
What Safety Precautions Should You Take During Water Heater Maintenance?
Always disconnect electrical power at the breaker box or shut off the gas supply before any work begins. Wear protective gloves and eyewear when draining hot water or handling corrosive deposits. Place a drain hose securely in a safe location to prevent scalding or water damage. Keeping children and pets away during maintenance reduces the risk of accidental injury.
When Is It Time to Call a Professional for Water Heater Repairs?
Unusual noises like banging or popping, persistent leaks around fittings and failure to maintain temperature despite flushing indicate internal component failure. Corrosion inside the tank or a broken dip tube requires specialised tools and replacement parts. Professional assistance from Mack’s Plumbing ensures safe handling of gas lines or electrical connections and helps you avoid costly tank replacements.
When Should You Call a Professional Plumber Instead of DIY?
DIY plumbing confers confidence and can resolve many minor issues, but complex repairs carry risks of water damage, code violations and incomplete fixes. Recognising these scenarios preserves your home’s safety and integrity. This section examines DIY risks, outlines Mack’s Plumbing services and provides clear indicators for expert intervention.
What Are the Risks of Attempting Complex Plumbing Repairs Yourself?
Complex tasks like in-wall pipe replacement, sewer line clearance or backflow prevention device installation require specialist tools and knowledge of local codes. Incorrectly soldered joints or non-compliant fittings can cause hidden leaks, mold growth and structural damage. DIY errors often lead to repeated repairs and higher cumulative expense. Entrusting these tasks to professionals minimises risk and delivers durable, code-compliant results.
How Can Mack’s Plumbing Help with Emergency and Complex Plumbing Issues?
Mack’s Plumbing offers comprehensive repair and maintenance services across Forney, Terrell, Dallas and surrounding areas, responding promptly to emergencies and complex faults. Certified technicians deploy advanced leak detection, drain camera inspection and trenchless repair methods to restore systems with minimal disruption. Their expertise extends from residential installations to commercial projects, ensuring reliable outcomes and peace of mind. For issues beyond simple fixes, scheduling a service appointment guarantees expert resolution.
What Are Common Signs That Require Expert Plumbing Intervention?
Persistent water stains on walls or ceilings, gurgling sounds beneath floors and foul odours from drains signal hidden leaks or sewer line blockages. Rapid pressure drops, frequent fixture failures and visible rust on supply lines often indicate pipe deterioration. Electrical shocks near fixtures combined with water leaks demand immediate professional attention. Identifying these warning signs early and engaging qualified plumbers protects property value and occupant health.
How to Contact Mack’s Plumbing for Reliable Local Plumbing Services in Texas?
To schedule an appointment or request a quote, homeowners and business owners can call the Mack’s Plumbing office or submit a service inquiry through their contact portal. Their team will provide expert advice, transparent scheduling and prompt arrival for urgent repairs. Emphasising customer-centric service, Mack’s Plumbing ensures open communication, professional conduct and dependable workmanship. Reach out today to maintain confidence in your plumbing system and secure lasting solutions.
Mack’s Plumbing combines friendly DIY guidance with professional backup, empowering homeowners to manage simple fixes and rely on experts for tougher jobs. By following these instructions, you can tackle minor leaks, clogs and pressure issues confidently, while knowing when to call a plumber for advanced repairs. Proper maintenance and timely intervention save water, time and future expense. Embrace DIY solutions responsibly and partner with Mack’s Plumbing for seamless, trustworthy support.

Customer Testimonials

Robert with Macks Plumbing has saved my repair/reno project so much time and money by finding the problems that other plumbers couldn’t. He is easy to work with, direct and honest. Couldn’t recommend him with more confidence.
Quick response, knowledgeable and courteous. Techs that came for water heater made sure everything cleaned up and working properly. Will use Mack's again when I need work in future.
Excellent service. Prompt & professional. Great communication on arrival time and repairs needed. Easy to work with. We will use them again.
Showed before the expected time and both guys were polite, knowledgeable and more than ready to get the job done. I will definitely be using them again and recommending them to everyone I can!

Financing
We make it easy to get the plumbing services you need with flexible financing options through Wisetack, including zero down plans with approved credit.